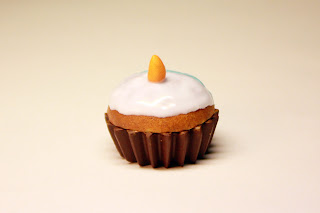
You can watch this tutorial also on my youtube chanel.Unfortunately I still don't have camera to make an actual video so this one consists of pictures which you can see down below.Here is a link to that video:
https://www.youtube.com/watch?v=Pa0pNYGlnOE
1) Equipment
For this project you're gonna need:
- white, beige, brown, black, red, yellow and blue polymer clay.
- acrylic paint in brown and ochre
- fimo liquid (or tanslucent liquid Sculpey)
- fimo gloss varnish (or any other brand gloss varnish)
- glitter
- eye pin
- cupcake mold
- cutter, long needle or toothpick, paint brush and scalpel
2) Firstly,prepare one big ball of beige clay.Mix blue and white clay so you'll get baby blue colour.Mix red and yellow to get an orange clay.Prepare 8 little balls from black clay.
3)Using the brown polymer clay and the cupcake mold prepare the base of our creation.Bake it and wait a little bit until it cool down.The colour of the base is
totally up to you.Brown is my choice:)
*If you don't have cupcake mold you can also do cupcake base using a needle or toothpick. I will probably make tutorial for this in future.
4) Using the beige clay create the top of the cupcake.Use a toothpick or needle to make a cake texture.
5) Now use an acrylic panit to colour the top of the cupcake.I find ochre and brown as the best colour combination.
6) Now,cut the eye pin to make it fit the cupcake base.
Attach the eye pin to the top of the cupcake.This step will allow you to transform this creation later into the charm or pendant.
7) Use the scalpel or any sharp tool to create the auxiliary line on the top of the cupcake from one side to another.That's how you're gonna separate the
snowman face from snowman hat.This step will help you later in putting liquid clay evenly.
8) Bake the cupcake for about 10 minutes.This step will help in hardening the paint on the top of the cupcake.If you won't bake it, the paint may mix with the liquid clay that we're gonna put on the top of the cupcake so the colours won't be clear and nice.
9) Mix the white polymer clay with FIMO liquid.When the mixture will be smooth apply it on the part 1 (snowman face).
Be careful and try not to cross the auxiliary line.Don't apply mixture all over
the top of the cupcake.Leave +/- 3mm from the edge without frosting.That will make our cupcake look more realistic.
10) Use baby blue clay and FIMO liquid to create blue frosting.Put the mixture on the part 2 (hat).
11) Use the orange clay to create a carrot.Apply it in the middle of the snowman face.Our snowman finally has a nose:)
12) Attach black balls to make snowmans eyes and smile.
13) Now the tricky part:)Take the big needle or long toothpick and apply glitter on the snowmans hat.
14. Finally, make a little ball from baby blue polymer clay and attach it into the
snowmans hat.That will be a pompon.Apply a little bit of glitter on that part too.
And that's it! Bake the cupcake for 10/15 minutes.Glaze it after baking.
Hope you guys enjoy that tutorial! love, TCHS <3 Please subscribe if you haven't already!
P.S. some of my creations


No comments:
Post a Comment